Yhteisöllinen työpaja
After a couple attempts and redesigns I finally managed to finish my rucksack project this summer. I'm writing this blog post as a summary. Maybe it will be useful for other people who plan to make something similar.
A few years ago I decided to make a packrafting trip, combining hiking one way, and returning on a packraft. I didn't want to take my hiking backpack, because normal backpacks, with their many compartments and nylon fabric are not a good fit for wet environments. Having many compartments only adds weight and nylon absorbs water, adding even more weight. They also dry long, once they get wet, especially when water gets inside. For that trip I made my own drybag carrier, designed to fit Sea To Summit 65L drybag. To carry potentially wet things, like a tent, I have added to it two side bags. The overall construction worked well enough for me to finish the trip, but I wasn't satisfied. The construction was fairly heavy and the side bags were not very stable. In addition, the drybag combined two functions: water protection, and structural strength (holding items, protection from abrasion, etc.), which is not very elegant. Equipped with these lessons and dissatisfaction with the options available on the market, I started working on another backpack.
The idea was to create a non-waterproof rucksack, and use a plastic bag inside the main (and only) compartment to protect items from water. Instead of using waterproof fabric, which eventually gets wet anyway, and dries long, I wanted the backpack to just not absorb a lot of water and dry fast. Plastic bags used as liners are a standard solution, used by many hikers even if they have other layers of defense against water, like backpack covers. Having a sealed plastic bag inside has also a added benefit of making the backpack buoyant (as long as the bag stays intact...).
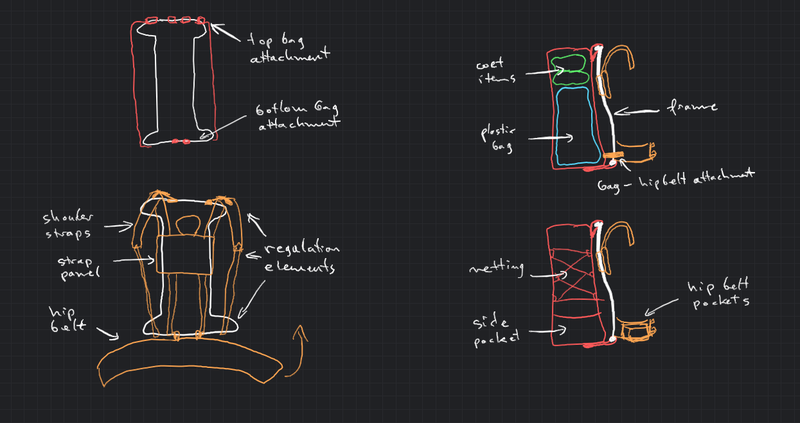
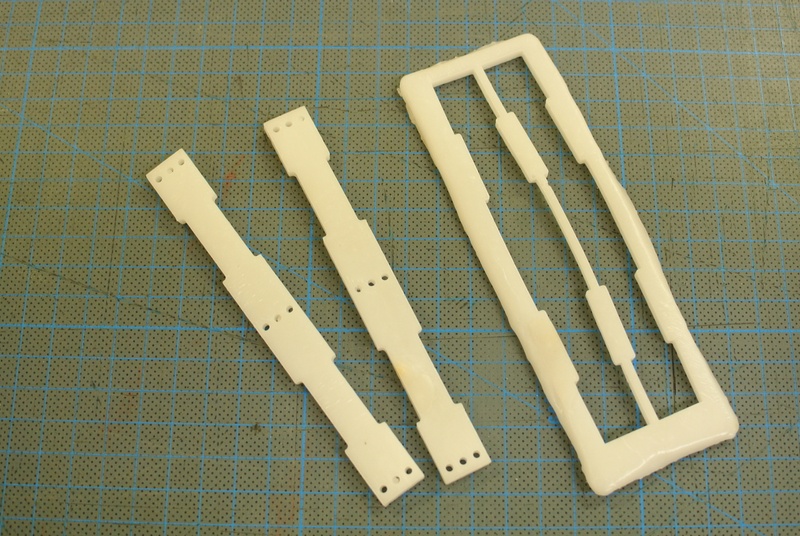
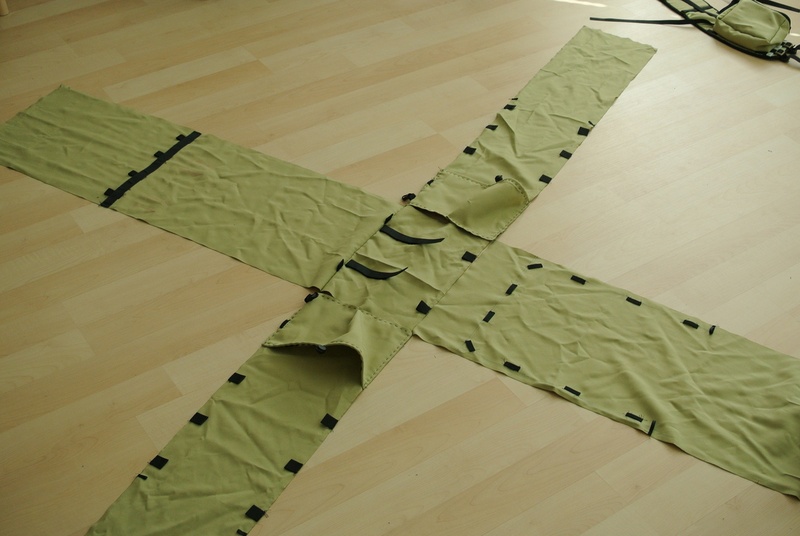
I wanted to have just one big compartment, plus two side pockets for water bottles and hip belt pockets/bags for snacks, camera, compass, etc. This fairly minimal construction limits amount of material used, so the rucksack is lighter and can't hold as much water. In contrast to ultra-light backpacks, I wanted mine to have a frame for added comfort. The frame also serves as an interface between the suspension system (shoulder straps, hip belt) and the bag itself. I think this modularity makes it easier to fix things, than when sewing a monolithic rucksack. Also thanks to that I could test the frame and suspension system without having a bag.
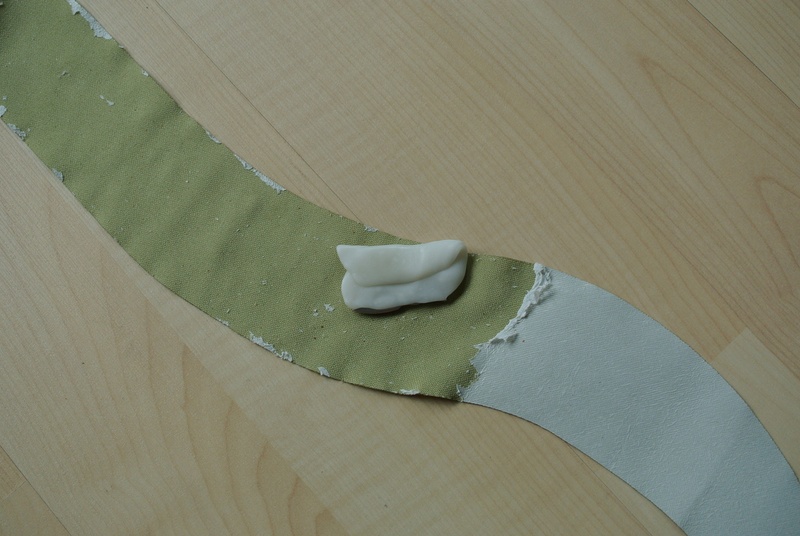
While backpack materials can be easily sourced online (shelbyoutdoor.com, extremtextil.de), sourcing the specific type of fabric I wanted turned out to be a challenge. I couldn't find a polyester fabric without any waterproof layer (they usually have a PU one). I ended up buying a fabric with polyethylene coating, and then removed the coating. I used a combination of two methods. The first involved folding the fabric in half (with polyethylene on the inside), using a modeling iron to heat the fabric so that the two layers bond, and then unfolding the fabric. This way the coating would get removed from one side of the fabric (it was hit and miss, in practice). The second method was scraping the fabric with a scraper made from a scalpel and PCL (for a handle). It worked OK, but it takes a lot of time. I think the PU coating would be even worse to remove, unless there is some way to dissolve it.
The only other notable material challenge was making a attachment bar for hip belt buckles. I tried using acrylic, but it proved too fragile. So instead I made a plate from PCL granules, and then cut it on the laser cutter. It worked very well, but the plastic needs to be soaked overnight in water with dish soap after cutting, because it stinks (there is probably some weird chemical or two produced while cutting).
I have cut the fabric and 3D mesh using the laser cutter. I have prototyped the shoulder straps and hip belt from packing paper. It makes it fast, easy and cheap to iterate, even if paper doesn't stretch, so it not a perfect model. Using laser with synthetic fabrics and 3D mesh is a good choice, because the edges are automatically protected from coming apart by melting. With 3D mesh there is also much less mess than when cutting with scissors. Just use enough power and slow enough speed to cut it cleanly.
Due to my low skill in controlling our industrial sewing machines I have essentially sewn the rucksack by hand. In case of the bag itself, I have later reinforced the seams using machine, because it's easy to do once the fabric is already held together. There was also a lot of more tricky sewing, like sewing a binding tape on a 3D mesh, which I don't know if is even possible to do on a "normal" sewing machine.

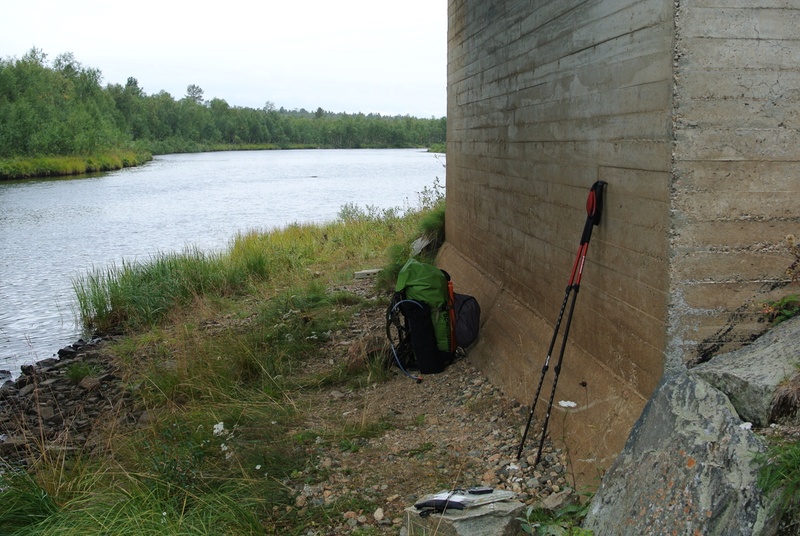
I tested the rucksack on a ~200 km trip from Utsjoki to Inari, through Paistunturit, a bit of Kevon luonnonpuisto, and Muotkatunturit. I slept 3 nights in a tent and 4 in huts. There was at least some rain during most days, with one of constant intense rain, one of constant mild rain, and one with multiple storms. The trip took about 7 days, and my load was ~15kg.
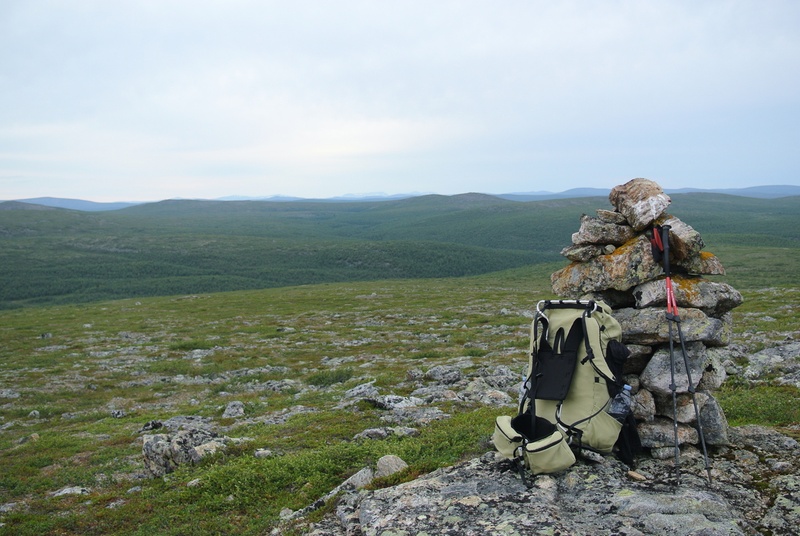
The bag didn't break and kept the items dry, which is a success. It was also comfortable and convenient to use, with the limited load I had.
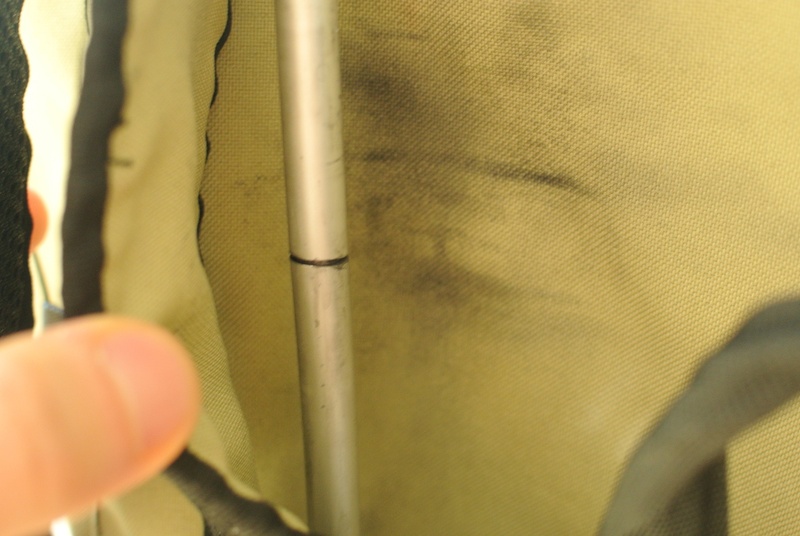
From more negative things, the webbing had tendency to slide on the frame. This will probably be difficult to fix without changing the geometry of the frame. Another problem was that o-ring separating two parts of the frame kept moving. As a result the parts were grinding against each other, creating a lot of mess. This can be fixed by creating a plastic "coupling rod" with a ring-shaped protrusion acting as an o-ring. Not sure how well would plastic hold up in this role, though. Finding a good plastic bag isn't easy as well. The easiest option is to buy a big trash bag, which are cheap, but their quality is a lottery. Also they are usually black, which makes it challenging to find things in the bag. There are specialized Nylofume backpack liners, but their shape and size are not suitable for this rucksack.
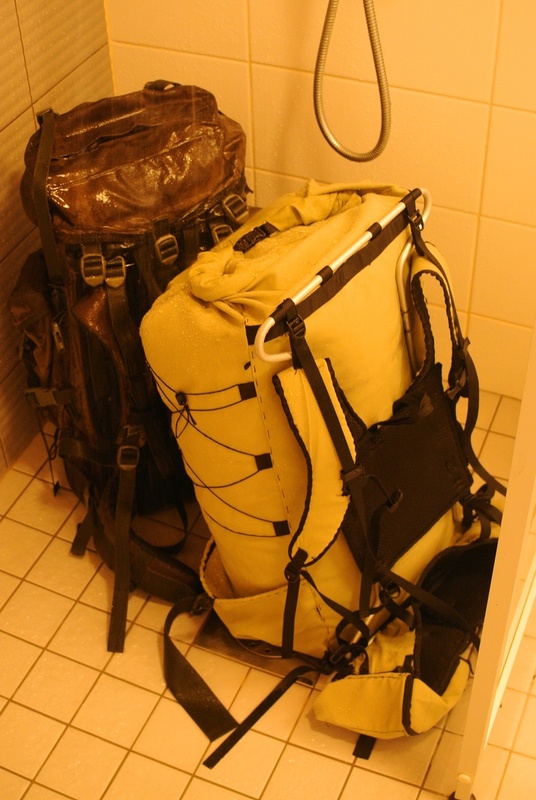
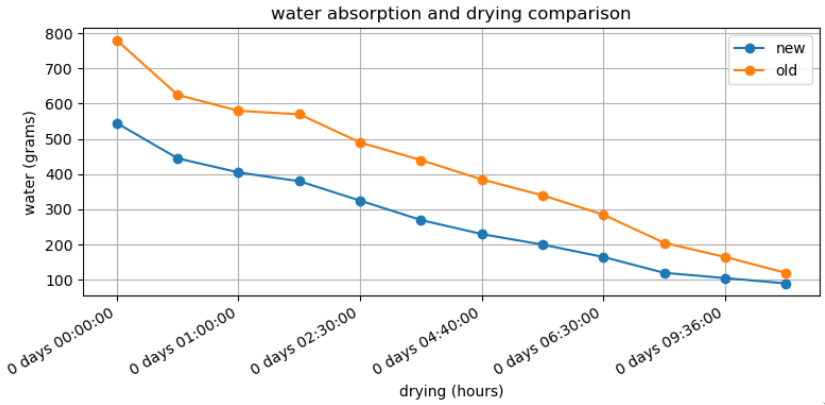
After doing the trip I made two more experiments. The goal of the first one was to measure how much water my new and old bag absorb and how quickly they dry. I showered the rucksacks for 5 minutes each, and measured their weight as they dried. Here are the results:
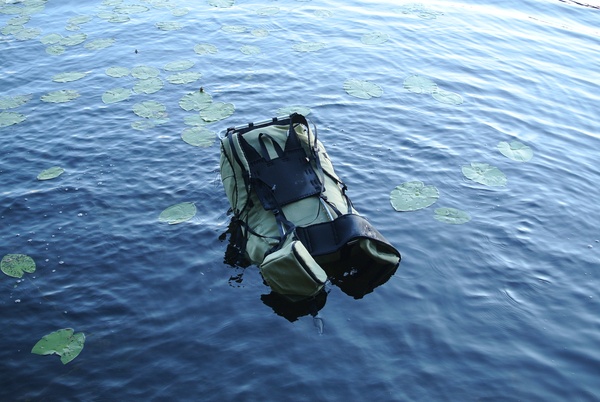
The second one was a quick buoyancy and swimming test. I filled the backpack with blankets and pillows (in a plastic bag, ofq), threw it into a lake, and swam around a bit using it as a flotation aid. It worked well enough, I think it would be a suitable substitute to a packraft, when crossing rivers. Since the bag can be damaged when hiking, especially in conditions like Icelandic interior (volcanic ash is abrasive and abundant), taking a second bag for crossing seems reasonable. Weight-wise it still makes sense, since even a standard trash bag weights only ~80g, while a packraft ~500g+. Here is a pic:
Comments
There are currently no comments
New Comment